Showing posts with label measurement. Show all posts

Saturday, February 28, 2015

Synchronize Your Measurements with Your List Transients

Hi everybody!

My blog post this month is the result of a recent customer question.  The question was: how do you synchronize measurements with list transients?  The short answer is that you use the built in digitizer to generate enough points to sample the measurements over the entire transient.  The rest of this blog will provide the long answer.  The program that I am using here was written for a N6762A DC Power Module but the technique will work with any power supply that has a built in digitizer such as the Advanced Power System or any N6700 module with option 054.

For simplicity’s sake, we are going to use a 5 point list.  The voltage steps are 1 V, 2 V, 3 V, 4 V, and 5 V and the dwell times are 0.1 s, 0.2 s, 0.3 s, 0.4 s, and 0.5 s.  Let’s first set the list up (please note that all programming is done in VB.net with VISA-COM):


The next thing to do is to set up the measurement system.  We need to figure out the total number of points that we need measure so that we can cover the entire transient.  The first thing that we need to do is to calculate the total time of the list transient (you can even do this in your program):


The total time of our transient is 1.5 s.  Now we need to use this to figure out the number of points. I am going to choose a measurement interval of 40.96 us.  This means that we want to take a measurement every 40.96 us for 15 s.  To get the total number of points, you need to divide the total transient time by the measurement time interval:

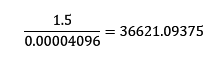
I’m going to round down and use 36,621 points.  I’m also going to tell the power supply to use the binary data format because as we know from my previous blog posts, this is the fastest way to read back data.   Here is the code to set up the digitizer:


We will set our trigger source to bus for both the transient system and the acquire system:


Next we initiate both systems:


Once the initiate is complete, we send a trigger:

This will start both the list transient and the digitizer.  After everything is completed, we can fetch our measured voltage array:


This array will have all of our measurements.

I hope that this has been useful, have a good month everyone.


Wednesday, January 7, 2015

A new current measurement methodology: It’s all about counting the electrons going by!

One thing near and dear to us here at the Power and Energy Division is making accurate current measurements. What exactly is current? It’s basically the flow of electric charge per unit of time. In a conductor it’s the flow of electrons through it per unit of time. 

The ampere is the fundamental unit of current in coulombs per second, which equates to 6.241x10¹⁸ electrons per second. Accurate current measurement is one of the core values of virtually all of our products. Some of the precision SMU products can measure down to femtoamp (fA) levels (10-15 amps). This is where we tend to muse that we’re getting down to the levels where we’re virtually counting the individual electrons going by.

While there are a few different ways of measuring current, by far the most common is to measure the voltage drop across a resistive shunt. With careful design this provides the most accurate means of current measurement. There are a lot of non-obvious factors that can introduce unexpected errors that many are not aware of, leading them to believe they have better accuracy than what it really is. A good discussion of what it takes to truly make accurate current measurements was covered in a previous posting “How to make more accurate current measurements”(click here to review). We go through great pains in addressing these things in our products in order to provide accurate and repeatable measurements.

Unlike the volt and the ohm, which have quantum standards for their electrical units, the ampere instead relies on the standards for the volt and ohm for measurement, as a quantum standard for the ampere that directly relates it back to charge is still lacking. However, that may change in the not too distant future. A group of scientists were awarded the Helmholtz Prize in metrology for realization of the measurement of the ampere based on fundamental constants. Basically they’ve created an electron charge pump that moves a small, fixed quantity of electrons under control by a clock. You can say they’re literally “counting the electrons as they go by”. This could become the new SI standard reference for current measurement. To me this is very fascinating to find out about. More can be learned on this from the following link to the press release “Helmholtz Prize for the “new” ampere”(click here to review).  I am curious to see how this all plays out in the long run. Maybe it will lead to yet another, and better, way to make more accurate current measurements in products we all use today in our work in electronics!

Wednesday, November 13, 2013

How to Make More Accurate Current Measurements

There are a number of ways to make current measurements, including magnetically coupled probes, Hall-effect devices, and even some more exotic field sensing probes, but a good quality resistive shunt really cannot be beat in terms of accuracy, bandwidth, and overall general performance.

We likewise make considerable use of high performance shunts in our DC power products to provide extremely accurate current read-back of load currents, spanning the full range of output loading. Not only is the quality and design of the shunt itself critical, but how you treat it and make use of it are all equally important to get great current measurement performance. At the surface it may seem simple; it’s just measuring the voltage drop across a resistor. In reality it is no simple task. It requires appropriate metrological resources to validate the performance.  There are a lot of potential sources of error to recognize, quantify, and contend with.

When working with folks I sometimes encounter those who prefer to develop in their own current measurement into their test systems, instead of relying on the current read-back system already build into their system DC source. There are times when this is the right thing to do and is fine when done correctly. However some of the time there is the preconception that the DC source cannot provide an accurate measurement. The reality is there is a wide selection of DC sources available spanning a wide range of performance, Most likely something will be available that adequately addresses one’s needs. A second issue is, when developing current measurement capabilities for a test system, is truly recognizing all the potential sources of error. It goes well beyond having a good DVM and a good shunt resistor in the test system.  

A colleague here in our R&D group, Mark Peffley, wrote a comprehensive article that was just published. It covers a myriad of things in depth to be taken into consideration in order to make accurate current measurements, including:
  • Temperature dependencies
  • Self-heating and thermal equilibrium
  • Temperature gradients
  • Thermo-electric effects
  • Additional sources of offset errors
  • Voltage drop considerations
  • Shunt selection practical considerations
  • And more!
So using a shunt is a great foundation for making highly accurate current measurements. That’s why we use them in our power products. But, as Mark points out, there is a lot more to it than just Ohm’s law. When using one of our power products we factor all these things in so that they become a non-issue for the user. However, if you do plan to add current measurement into your test systems then I highly recommend reading Mark’s article “Obtain Accurate Current Measurement” (click here to access) as it is a great reference on the subject!

Thursday, September 12, 2013

How fundamental features of power supplies impact your test throughput – Part 2

In part 1 of” How fundamental features of DC power supplies impact your test throughput” (click here to access) I shared definitions of some of the fundamental power supply features that impact test throughput, including:
  • Command processing time
  • Up-programming response time
  • Down-programming response time


Another fundamental DC power supply feature impacting test throughput is its measurement time. There are actually two aspects to a DC power supply’s measurement time as depicted in Figure 1:
  • Measurement settling time
  • Measurement integration time


Figure 1: DC power supply measurement time

A good indicator of a DC power supply having a high performance measurement system is having programmable measurement integration time, or aperture time, often programmed in power line cycles (PLCs).  One reason for having a programmable integration time is for minimizing any 50 or 60 Hz AC line ripple getting into the DC measurement, by setting the time one or more multiples of a PLC.  Setting the time to 1 PLC provides good ripple rejection with relatively good throughput. When AC line ripple is not an issue the integration time can be set even smaller than 1 PLC, further reducing measurement time. When the DC power supply has a programmable measurement integration time it will no doubt also have a fast-responding measurement system as well, typically just milliseconds, to complement the higher achievable throughput with programmable measurement integration time.

In comparison basic DC power supplies commonly use a 100 millisecond fixed integration time to support AC ripple rejection for both 50 and 60 Hz line frequencies. They also have low bandwidth, slow-responding measurement systems, which can long time to settle after any step change in loading, before a valid measurement can be taken.

We have just introduced our Advanced Power System (APS) DC power supplies. This is a family of high-performance, high power (1 and 2 kW) DC power supplies designed to address the most demanding test challenges. These fundamental throughput-related features for APS are typically more than two orders of magnitude faster compared to more basic-performance DC power supplies, providing much better throughput in manufacturing test. A colleague of mine recently posted details of their introduction on his “General Purpose Electronic Test Equipment (GEPETE)” blog (click here to access) which I believe you will find of interest. Included in this introduction is a link on throughput that takes you to a series of application briefs I have written that go into more detail on improving test throughput with the DC power supply, which you may find very useful.


So how much test throughput improvement might you expect to see by switching from a basic-performance DC source to a high-performance DC source? Well, it really depends on how much the testing makes use of the DC power supply. If it only uses the power supply to provide a fixed DC bias to the device under test (DUT) that never changes for the duration of the test then it will not make a significant difference. More often than not however, a DUT is tested at several bias voltages with several current drain measurements taken for the various bias voltage settings and DUT operating modes. This can add up to a considerable amount of test time. In this case a high-performance DC power supply can more than pay for itself many times over due to improved test throughput.  To get an idea of the kind of difference a high-performance DC power supply can make I set up a representative benchmark test It compares the throughput performance one of our new APS DC power supplies to that of a more basic-performance power supply.  If you are interested in finding out how much difference it made, I made a video of this benchmark testing, entitled “Increasing Test Throughput with Advanced Power System” (click here to access). All I am going to say here is it is an impressive difference but you will need to watch the video to see how much difference!

Wednesday, July 17, 2013

Consider the guard amplifier for making more accurate sub-µA current measurements with your DC source

As is the case with many sourcing and measurement challenges, when attempting to measure extreme values of most anything, factors that you can be blissfully unaware of, because they normally have an inconsequential impact on results, can become a dominant error to deal with. One example of this is when trying to make good low level leakage current measurements on devices and components and “phantom” leakages exceed that of the device you are attempting to test.

When measuring leakage currents of around a µA and lower, it is important to pay attention to your test set up as it is fairly easy to have leakage currents paths in the set up itself that range from adding error to totally obscuring the leakage current of the DUT itself you are trying to test. These leakage current paths can be modeled as a high value resistor in parallel to the DUT, as shown in Figure 1.


Figure 1: Leakage current path in DUT test fixture

  • Many things can cause leakage currents on the fixture contributing to leakage current measurement error of the DUT:
  • Is the PC fixture board made from appropriate high impedance material?
  • Is the PC board truly clean?
  • Was de-ionized water used to clean the PC board?
  • If already in service for quite some time, have contaminants slowly built up over time?
  • Any components associated with the connection path to the DUT are, or have become, unexpectedly leaky?
  • Any standoffs and insulators associated with the connection path to the DUT are, or have become, unexpectedly leaky?


Even with all the above items in check there are still times when more needs to be done to further reduce leakage current inherent in the test set up. To help in this regard a guard amplifier is often added on high performance source-measure units (SMUs) to mitigate errors introduced from leakage current paths in the test set up. The Agilent N678xA and the B2900 series are examples of SMUs that include guard amplifiers. Application of a guard amplifier is illustrated in Figure 2.


Figure 2: Guard amplifier in a leakage current test set up

The guard amplifier is a unity gain buffer connected to the output of the SMU to provide a voltage that matches the SMU voltage. The guard amplifier can typically furnish 100’s of µA or more to offset any leakage currents. The test set up needs to be designed to incorporate a guard, which is a conductive path that surrounds, but is not connected to, the SMU’s output path. The guard and guard amplifier do not eliminate any leakage paths. Rather they “intercept” and furnish the leakage current. Because the guard surrounding the SMU output path maintains its potential at that of the SMU’s output potential, the net difference is zero. Because the potential difference is zero no current “leaks” from the SMU output to the guard. The only current now flowing from the SMU output is that which is flowing into the DUT itself. This is just one more tool to get accurate results when making measurements at an extreme value; in this case when making extremely low leakage currents!

Sunday, March 31, 2013

Watt's Up with Datalogging and Digitizing?


All of our power supplies offer the ability to take an average measurement using either the front panel or the MEAS SCPI commands.  Some of our newer power supplies have some more advanced measurement capabilities.   The two capabilities that we are going to look at today are digitized measurements and datalogging.   Let’s take a short look at each one and then talk about when to use each one.

The digitizer has been in our products for a while now.  With the digitizer, you define three parameters and the measurement uses these parameters to return an array of measurements back to you.  The three parameters are: the number of points, the time interval, and the points offset.  The number of points is pretty simple.  It is the number of measurements that you want to take as well as the size of the array that you are going to read back.  The time interval is the pace of the measurements.  This is also the time between the points in the array.  The points offset is a way that you vary the starting point of the array.  This offset can be negative to return measured points before the trigger or positive to delay the start of the measurement.  The most points that we can measure and the fastest time interval is with our N678xA SMU modules.  These modules have a time interval of 5.12 us and a total number of points of 512 Kpoints (keep in mind that 1 Kpoint is 1,024 points).  This yields a total time of 5.12 us x 512 x 1,024 which yields a result of 2.68 seconds.  So the longest measurement that you can make is 2.68 seconds.  The largest time interval that we can measure is 40,000 seconds.  Setting this with the highest number of points would yield 40,000 s x 512 x 1,024 yields a total acquisition of 20,971,520,000 seconds.  That is 666.83 years! 

The other advanced measurement capability that we are going to talk about is our datalogger.  With the datalogger, you set a total acquisition time and an integration time.  The integration time is the amount of time that the power supply will average measurements.  The measurement system is still running at its maximum digitizing rate but it is averaging those measurements and returning that averaged measurement.  The digitizer on the N6705B DC Power Analyzer also will return the maximum measured value and the minimum measured value of each integration period.  The quickest integration time on the N6705B is 20.48 us.  The only limitation in the amount of data that you can log with the internal datalogger is the file size (the maximum file size is somewhere near 2 gB).  If you want to datalog huge files, you can use the external datalog feature (I wrote another blog post about this) or use our 14585A software where the only limitation is the free space on your hard drive.  The catch on the external datalogger is that that the quickest integration time is 102 us.

So when do you use one over the other?  It is pretty simple.  When you want to make a long term measurement (days, weeks, etc.) at a fast rate you should use the datalogger.  You would use this when you are looking to measure something like long term battery drain.  If you are looking for a more short term, faster measurement you would use the digitizer.  You would use the digitizer to measure something like inrush current. 

These are a few of the great features available in our power supplies.  Please let us know if you have any questions on these features or any of the features of our power supplies.